Halloween Mini Pizzas
These Halloween Mini Pizzas are the perfect spooky treat for any gathering! Ideal for Halloween parties, family dinners, or just a fun snack, these mini pizzas allow everyone to unleash their creativity while enjoying delicious flavors. With the ability to customize each pizza with playful toppings, they become a delightful activity for both kids and adults alike.
Why You’ll Love This Recipe
- Easy to Make – With just a few simple ingredients and quick instructions, preparing these mini pizzas is a breeze.
- Fun for Everyone – Kids can get creative and design their own spooky pizza faces, making it an enjoyable experience for all ages.
- Quick Cooking Time – These mini pizzas bake in just 8–10 minutes, making them a fantastic option for last-minute snacks or meals.
- Versatile Toppings – You can use a variety of toppings based on your preferences, from turkey pepperoni to fresh veggies.
- Kid-Friendly – The fun shapes and colors will appeal to children, encouraging them to eat their veggies without fuss.
Tools and Preparation
Before diving into the recipe, gather your tools to ensure a smooth cooking experience.
Essential Tools and Equipment
- Baking sheet
- Parchment paper
- Spoon
- Oven mitts
Importance of Each Tool
- Baking sheet – Provides a sturdy surface for baking your pizzas evenly without burning.
- Parchment paper – Prevents sticking and makes cleanup easy after baking.
- Spoon – Ideal for spreading sauce and toppings evenly across your mini pizzas.
- Oven mitts – Protects your hands when removing hot items from the oven.
Ingredients
For these delightful Halloween Mini Pizzas, you will need:
For the Pizza Base
- 4 mini pizza crusts (store-bought or homemade)
For the Sauce and Cheese
- 1/2 cup pizza sauce
- 1 cup shredded mozzarella cheese
For Decoration
- Sliced olives
- Turkey pepperoni
- Bell peppers
- Mushrooms
Optional Seasoning
- Fresh basil
- Oregano
- Red pepper flakes
How to Make Halloween Mini Pizzas
Step 1: Preheat the Oven
Preheat your oven to 400°F (200°C) and line your baking sheet with parchment paper.
Step 2: Prepare the Pizza Crusts
Place the mini pizza crusts on the prepared baking sheet. Use a spoon to spread each crust with a generous spoonful of pizza sauce.
Step 3: Add Cheese
Sprinkle shredded mozzarella cheese over each pizza crust. Leave some areas uncovered for decoration later on.
Step 4: Create Spooky Designs
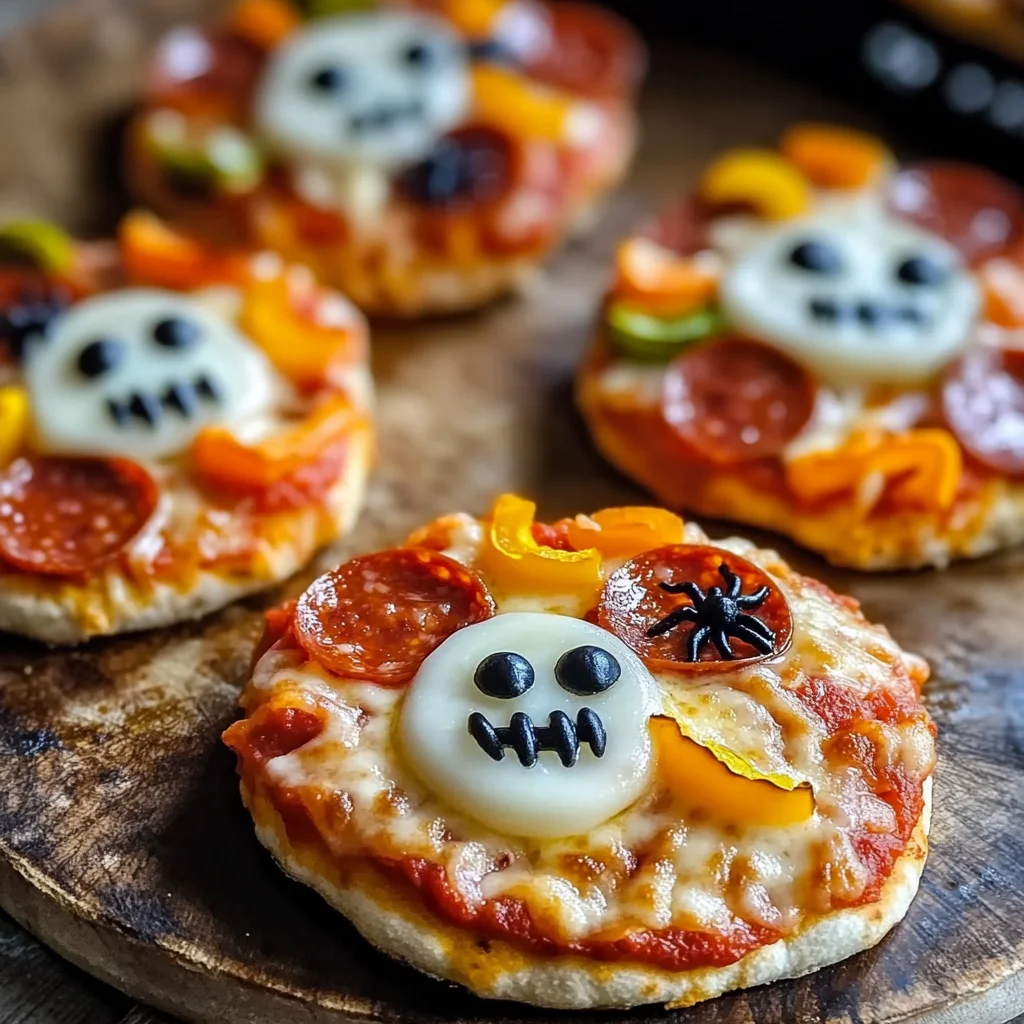
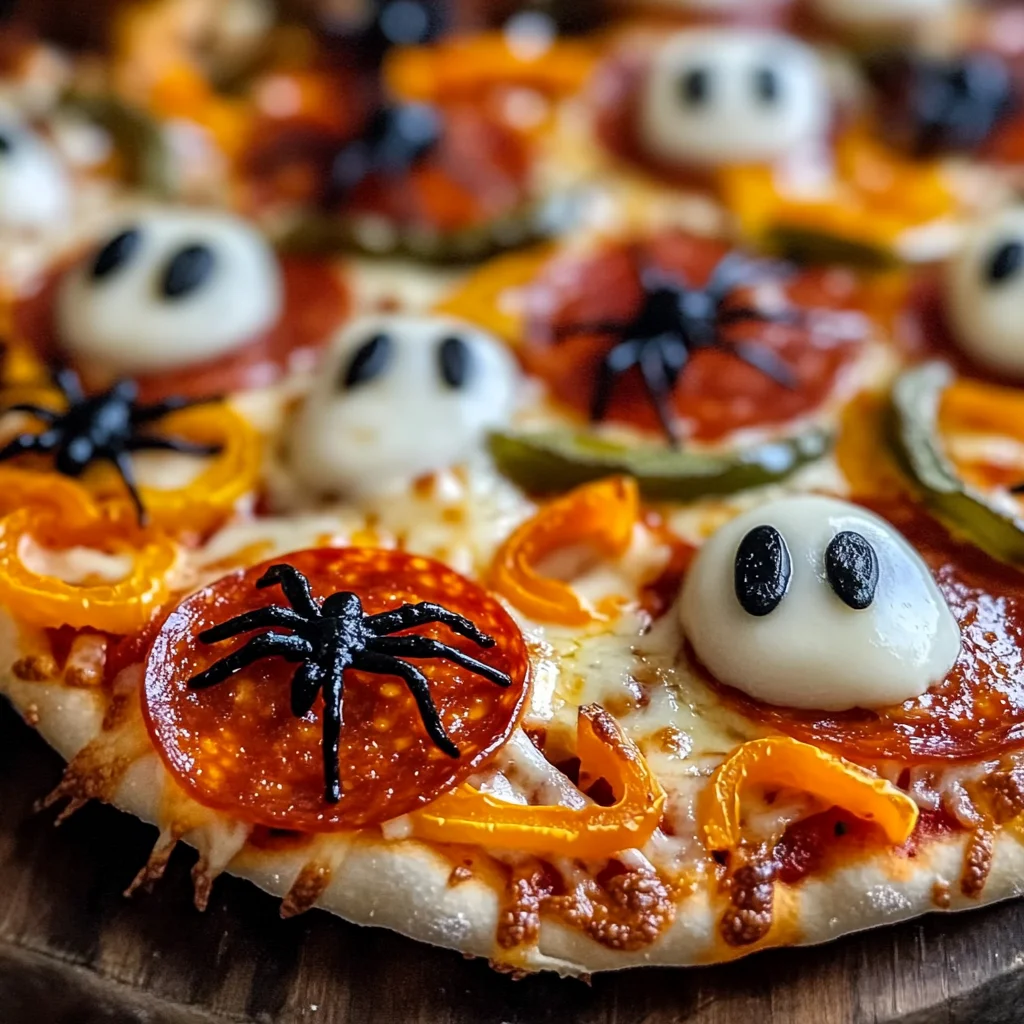
Get creative with your toppings! Use sliced olives as spider bodies, bell pepper strips as mummy wraps, or cut mozzarella into ghost shapes. Have fun designing unique Halloween themes!
Step 5: Bake the Pizzas
Bake in the preheated oven for about 8–10 minutes, or until the cheese is melted and bubbly, and the crust is golden brown.
Step 6: Serve Warm
Remove from the oven using oven mitts. Allow them to cool slightly before serving. Enjoy these festive treats warm!
How to Serve Halloween Mini Pizzas
These Halloween mini pizzas are not only a treat for the eyes but also for the taste buds. Serving them creatively can enhance the festive spirit of your gathering.
Creative Platter Arrangements
- Arrange the mini pizzas on a large platter with decorative elements like faux cobwebs or plastic spiders for an eerie vibe.
- Use black or orange plates to enhance the Halloween theme.
Dipping Sauces
- Offer a variety of sauces such as marinara, ranch, or garlic sauce in small bowls for dipping, adding extra flavor and fun.
- You can color some sauces with food coloring to match the Halloween theme.
Themed Drinks
- Pair the mini pizzas with themed drinks like spooky fruit punch or green smoothies, served in clear glasses with gummy worms hanging over the edge.
- Consider using fruit juices mixed with fizzy water for a refreshing option.
Fun Garnishes
- Add fresh basil leaves shaped like bats or other spooky garnishes to elevate the presentation.
- Use edible glitter or sprinkles that match Halloween colors for a whimsical touch.
How to Perfect Halloween Mini Pizzas
To make your Halloween mini pizzas truly memorable, consider these tips that ensure both taste and presentation are top-notch.
- Use Fresh Ingredients: Always opt for fresh vegetables and quality cheese to enhance flavor and nutrition.
- Experiment with Shapes: Cut toppings into fun shapes like ghosts or pumpkins using cookie cutters to make decorating exciting.
- Don’t Overload Toppings: A light hand on toppings ensures even cooking and prevents sogginess while still allowing creativity.
- Watch Baking Time: Keep an eye on your pizzas as they bake; remove them once the cheese is bubbly and crust is golden for best results.
- Serve Immediately: Enjoying them fresh out of the oven maximizes flavor and texture, making them more appealing.
Best Side Dishes for Halloween Mini Pizzas
These side dishes complement your Halloween mini pizzas perfectly, adding variety to your meal while keeping with the festive theme.
- Spooky Veggie Platter – Arrange an assortment of colorful veggies in shapes like ghosts and pumpkins, served with hummus or ranch dip.
- Monster Fruit Skewers – Assemble skewers with grapes, melon balls, and strawberries to create fun monster faces on sticks.
- Witch’s Broomsticks – Create broomsticks using pretzel sticks and string cheese cut into strips; they are simple yet thematic.
- Mummy Dogs – Wrap turkey hot dogs in crescent dough strips to resemble mummies, then bake until golden brown.
- Ghostly Salad – Toss together greens, cucumbers, and cherry tomatoes topped with mozzarella balls arranged like ghost faces.
- Pumpkin Soup – Serve warm pumpkin soup in small bowls adorned with spooky designs made from sour cream or herbs.
Common Mistakes to Avoid
When making Halloween mini pizzas, it’s easy to overlook a few details. Here are some common pitfalls and how to steer clear of them.
- Bold toppings choices: Using too many toppings can make your pizza soggy. Stick to 2-3 types for the best flavor and texture.
- Bold crust handling: Not pre-baking the crusts can lead to a chewy base. Always pre-bake for a few minutes before adding sauce and toppings.
- Bold cheese placement: Skipping cheese on some areas can lead to uneven melting. Spread cheese evenly for consistent gooeyness.
- Bold decoration timing: Decorating before cooking may result in burned toppings. Add delicate decorations like olives or herbs in the last few minutes of baking.
- Bold sauce amount: Overloading with sauce can make pizzas messy. Use just enough to cover the crust without spilling over.
Storage & Reheating Instructions
Refrigerator Storage
- Store in an airtight container.
- Keep in the fridge for up to 3 days.
Freezing Halloween Mini Pizzas
- Wrap each mini pizza in plastic wrap followed by aluminum foil.
- Freeze for up to 2 months for best quality.
Reheating Halloween Mini Pizzas
- Oven: Preheat to 350°F (175°C) and bake for about 10 minutes until heated through.
- Microwave: Heat on medium power for 30-45 seconds, checking frequently to avoid sogginess.
- Stovetop: Place in a skillet over low heat, covering with a lid until warmed through.
Frequently Asked Questions
What are Halloween Mini Pizzas?
Halloween mini pizzas are small individual pizzas decorated with spooky toppings, perfect for parties or family gatherings.
How do I customize my Halloween Mini Pizzas?
You can use various toppings like sliced olives, turkey pepperoni, or bell peppers to create fun designs that fit the Halloween theme.
Can I make these pizzas ahead of time?
Yes! You can prepare the mini pizzas and store them in the fridge or freezer until you’re ready to bake them.
What is a good dipping sauce for Halloween Mini Pizzas?
A simple marinara sauce or garlic-infused olive oil makes an excellent dip that complements the flavors of the mini pizzas.
Final Thoughts
These Halloween mini pizzas are not only delicious but also a canvas for creativity. You can easily customize them with your favorite toppings, making them fun for everyone at your gathering. Give this recipe a try and enjoy crafting your spooky masterpieces!
Halloween Mini Pizzas

Get ready for a spooky culinary adventure with these Halloween Mini Pizzas! Perfect for Halloween gatherings, family dinners, or a fun snack, these customizable mini pizzas let everyone showcase their creativity while enjoying delicious flavors. With just a few simple ingredients and quick prep, you can whip up these festive treats in no time. Ideal for kids and adults alike, the playful toppings bring the spirit of Halloween to your table. Bake them until golden brown, and serve warm for an unforgettable treat that’s sure to delight!
- Prep Time: 15 minutes
- Cook Time: 10 minutes
- Total Time: 25 minutes
- Yield: Makes 4 mini pizzas 1x
- Category: Main
- Method: Baking
- Cuisine: American
Ingredients
- 4 mini pizza crusts (store-bought or homemade)
- 1/2 cup pizza sauce
- 1 cup shredded mozzarella cheese
- Sliced olives
- Turkey turkey pepperoni
- Bell peppers
- Mushrooms
Instructions
- Preheat your oven to 400°F (200°C) and line a baking sheet with parchment paper.
- Place the mini pizza crusts on the prepared baking sheet and spread each one with a spoonful of pizza sauce.
- Sprinkle shredded mozzarella cheese over each crust, leaving some areas uncovered for decoration.
- Get creative with toppings: use sliced olives as spider bodies, bell pepper strips as mummy wraps, or cut mozzarella into ghost shapes.
- Bake in the preheated oven for 8–10 minutes until the cheese is melted and bubbly, and the crust is golden brown.
- Carefully remove from the oven using oven mitts and let cool slightly before serving.
Nutrition
- Serving Size: 1 serving
- Calories: 250
- Sugar: 3g
- Sodium: 450mg
- Fat: 10g
- Saturated Fat: 4g
- Unsaturated Fat: 5g
- Trans Fat: 0g
- Carbohydrates: 30g
- Fiber: 2g
- Protein: 12g
- Cholesterol: 20mg