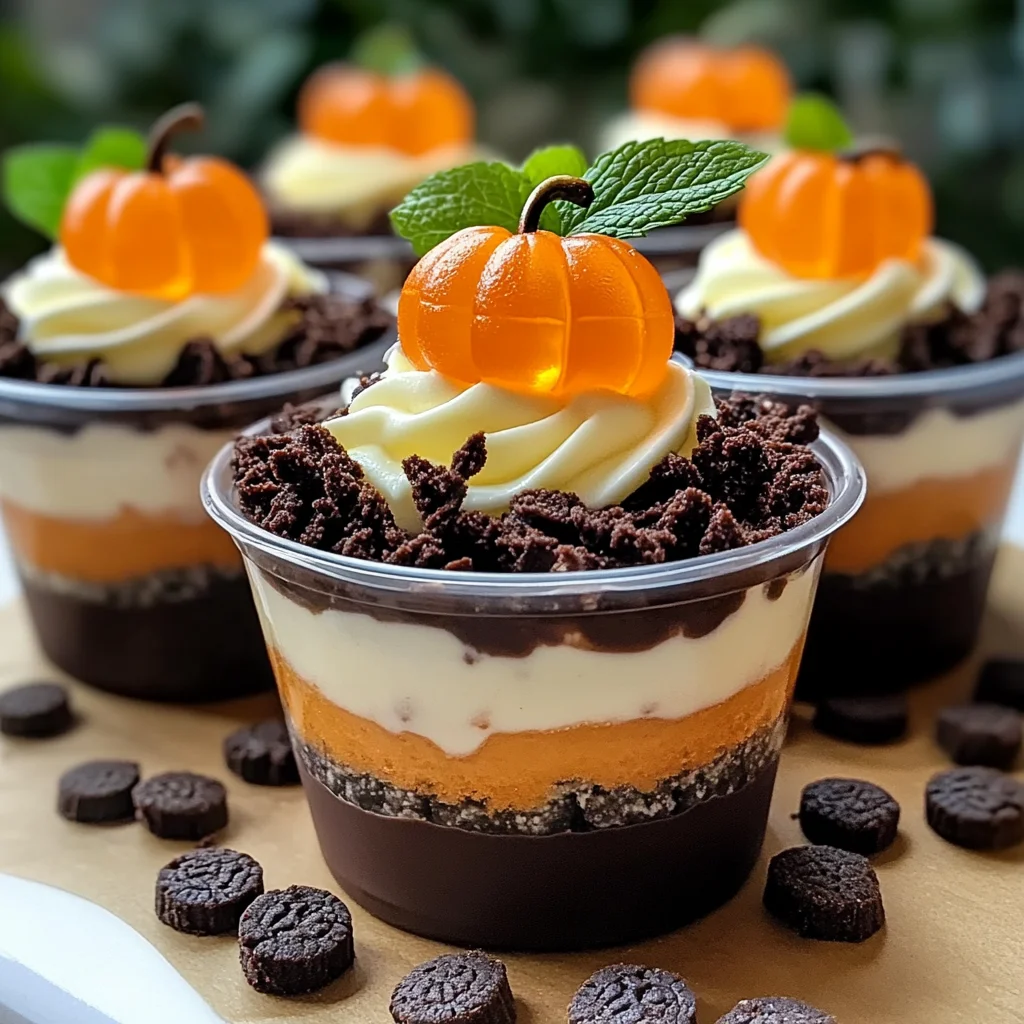
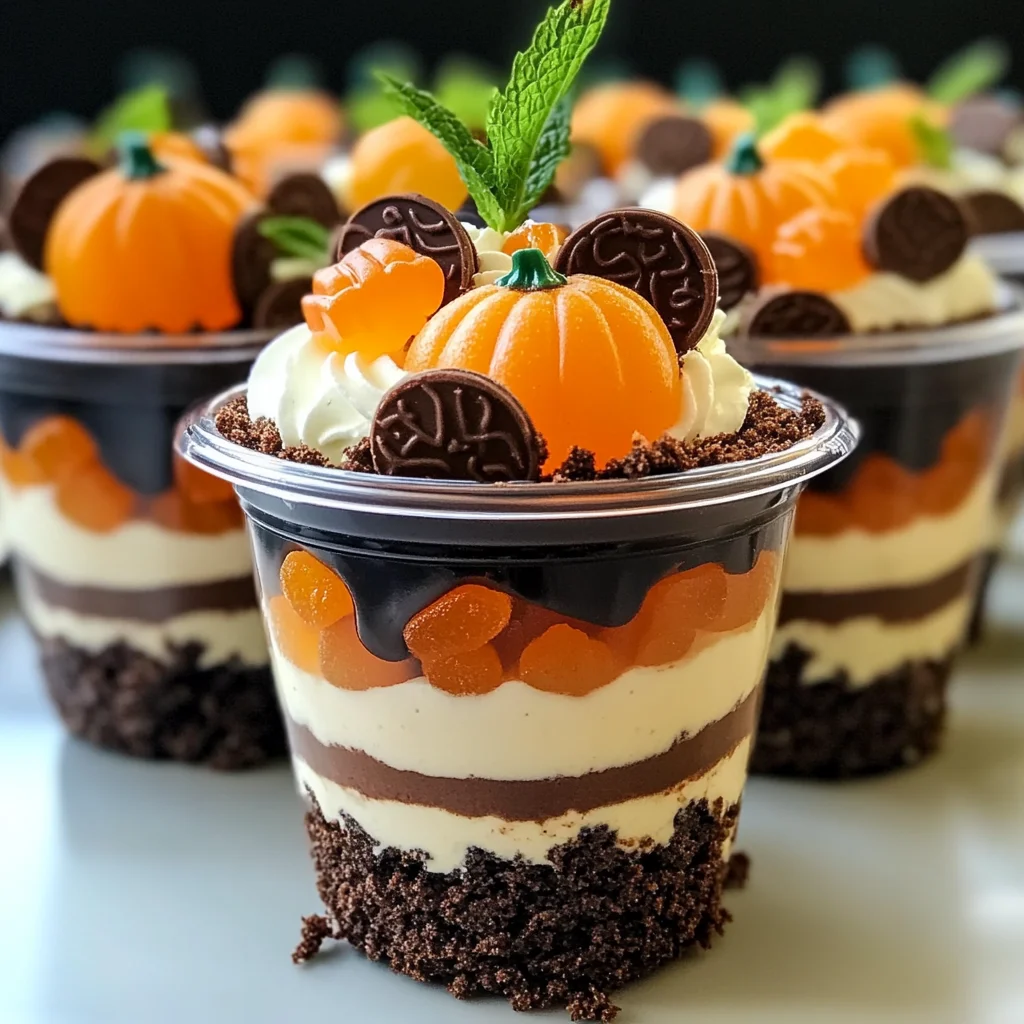
Pumpkin Patch Dirt Cups
What I love about this Pumpkin Patch Dirt Cups recipe is how approachable it is. You don’t need to spend hours in the kitchen or stress over complicated steps. These fun and whimsical treats are perfect for Halloween parties, family gatherings, or just a cozy night in. Their delightful presentation and creamy chocolate flavor make them a standout dessert that everyone will love.
Why You’ll Love This Recipe
- Easy to Make: With just a few simple steps, you can whip up these delicious cups in no time.
- Kid-Friendly Fun: Kids will enjoy helping with the layering and decorating, making this a great family activity.
- Versatile for Occasions: Perfect for Halloween, birthdays, or any festive gathering.
- No Baking Required: Enjoy a hassle-free dessert that doesn’t require turning on the oven.
- Deliciously Decadent: The combination of creamy pudding and crunchy cookies makes every bite irresistible.
Tools and Preparation
To create your Pumpkin Patch Dirt Cups, you’ll need some basic kitchen tools. Having the right equipment ensures a smooth preparation process.
Essential Tools and Equipment
- Mixing bowl
- Whisk
- Clear cups or bowls for serving
- Spoon or spatula
Importance of Each Tool
- Mixing bowl: A sturdy mixing bowl is essential for combining the pudding mix and milk without spills.
- Whisk: A whisk helps achieve a smooth pudding texture, ensuring no lumps remain.
- Clear cups or bowls for serving: Using clear containers showcases the layers of chocolate pudding and cookie crumbs beautifully.
- Spoon or spatula: These tools allow for easy layering of ingredients into your cups.
Ingredients
Here’s what you’ll need to make these delightful Pumpkin Patch Dirt Cups:
For the Pudding Base
- 1 3.9 oz box instant chocolate pudding mix
- 2 cups cold milk
For the Topping and Decoration
- 1 8 oz container whipped topping, thawed
- 1 package chocolate sandwich cookies (about 15–18 cookies)
- Gummy pumpkin candies (or candy corn pumpkins)
- Fresh mint sprigs (optional, for “pumpkin patch vines”)
How to Make Pumpkin Patch Dirt Cups
Step 1: Prepare the Pudding
- In a mixing bowl, combine the instant chocolate pudding mix with cold milk.
- Whisk together until well blended and smooth. Let it sit for about 5 minutes to thicken.
Step 2: Crush the Cookies
- Place the chocolate sandwich cookies in a resealable bag.
- Use a rolling pin or your hands to crush them into fine crumbs.
Step 3: Layer the Ingredients
- In your clear cups or bowls, start by adding a layer of chocolate pudding at the bottom.
- Follow with a layer of crushed cookie crumbs.
- Repeat these layers until you reach the top of each cup.
Step 4: Add Toppings
- Top each cup with whipped topping to create a fluffy surface.
- Decorate with gummy pumpkin candies and fresh mint sprigs if desired.
Step 5: Chill and Serve
- Refrigerate the assembled cups for at least one hour before serving to allow flavors to meld.
- Serve chilled and enjoy your delightful Pumpkin Patch Dirt Cups!
How to Serve Pumpkin Patch Dirt Cups
These Pumpkin Patch Dirt Cups are not only delicious but also perfect for creative presentation. You can serve them in various ways to enhance their fun, festive look.
Individual Cups
- Use small plastic cups or clear dessert glasses for a charming display. This allows each guest to have their own serving and enjoy the layers of chocolate pudding and cookie crumbles.
Family-Style Serving
- Present a large bowl filled with all the dirt cup ingredients mixed. Guests can scoop out their portions and customize their toppings with gummy pumpkins and mint sprigs.
Themed Party Display
- Arrange the cups on a tray surrounded by mini pumpkins and autumn leaves. This will create an eye-catching centerpiece for any Halloween gathering.
Layered Parfaits
- For a twist, layer the ingredients in a larger glass dish instead of individual cups. This not only looks impressive but also makes it easy to serve multiple guests at once.
Creative Garnishes
- Add additional garnishes like edible glitter or sprinkles for extra color. These touches can make your dirt cups even more appealing to kids and adults alike.
How to Perfect Pumpkin Patch Dirt Cups
To make your Pumpkin Patch Dirt Cups truly stand out, here are some tips that can elevate your dessert game.
- Chill before serving: Allowing the cups to chill for at least one hour will help the flavors meld and create a refreshing treat.
- Use fresh ingredients: Make sure your whipped topping is freshly thawed for the best texture and taste.
- Crush cookies finely: For an even dirt-like appearance, crush the chocolate sandwich cookies into very fine crumbs.
- Experiment with toppings: Feel free to add other candies like gummy worms or chocolate sprinkles to personalize your dirt cups.
- Make ahead of time: Prepare the pudding mixture in advance and assemble the cups just before serving for convenience.
- Add seasonal flair: Include small edible decorations like candy corn or autumn-themed sprinkles to enhance the visual appeal.
Best Side Dishes for Pumpkin Patch Dirt Cups
Pairing side dishes with your Pumpkin Patch Dirt Cups can create a well-rounded dessert experience. Here are some delightful options.
- Mini Cornbread Muffins: These savory bites complement the sweetness of dirt cups perfectly. Bake them in advance for easy serving.
- Apple Slices with Caramel Dip: Fresh apples dipped in caramel provide a crunchy contrast to the creamy dirt cups.
- Roasted Pumpkin Seeds: A crunchy, salty side that echoes the pumpkin theme while adding texture to your dessert table.
- Cheese Platter: Offer a variety of cheeses alongside crackers for a savory option that balances out the sweetness of dessert.
- Vegetable Crudités: Crisp veggies served with hummus or ranch dip make for a healthy side that guests will appreciate.
- Chocolate Chip Cookies: Classic cookies are always a hit and pair wonderfully with any dessert spread, including pumpkin patch dirt cups.
Common Mistakes to Avoid
Making Pumpkin Patch Dirt Cups is fun and easy, but a few common mistakes can make the experience less enjoyable.
- Incorrect pudding consistency: Ensure you mix the instant chocolate pudding with cold milk thoroughly to achieve a smooth texture. Avoid lumps by whisking well.
- Skipping the chilling time: Don’t rush this step! Allowing the cups to chill for at least 60 minutes helps them set properly and enhances flavors.
- Overcrushing cookies: Crush chocolate sandwich cookies just enough to resemble dirt, but avoid turning them into fine powder. This gives your cups a more realistic texture.
- Forgetting garnishes: Don’t overlook adding gummy pumpkin candies or fresh mint sprigs. These not only enhance the presentation but also add fun flavors and textures.
- Using expired ingredients: Check the expiration date on all your ingredients, especially the pudding mix and whipped topping, to ensure the best taste and texture.
Storage & Reheating Instructions
Refrigerator Storage
- Store Pumpkin Patch Dirt Cups in an airtight container.
- They will last for up to 3 days in the refrigerator.
Freezing Pumpkin Patch Dirt Cups
- It is not recommended to freeze these cups as they may lose their texture when thawed.
- However, you can prepare the pudding mixture and store it in an airtight container for up to a month before serving.
Reheating Pumpkin Patch Dirt Cups
- Oven: Not applicable for this dessert as it’s served chilled.
- Microwave: Avoid reheating in the microwave; enjoy cold for the best flavor.
- Stovetop: Not suitable; these cups are meant to be served directly from the fridge.
Frequently Asked Questions
Here are some questions commonly asked about Pumpkin Patch Dirt Cups.
How do I make Pumpkin Patch Dirt Cups gluten-free?
You can use gluten-free chocolate sandwich cookies instead of regular ones. Just ensure all other ingredients are gluten-free as well.
Can I customize my Pumpkin Patch Dirt Cups?
Absolutely! You can add different candies, such as gummy worms or sprinkles, for fun variations that suit your taste preferences.
What can I use instead of whipped topping?
For a dairy-free option, consider using coconut whipped cream or another plant-based whipped topping that suits your dietary needs.
How long do Pumpkin Patch Dirt Cups last?
These delicious cups can be stored in the refrigerator for up to 3 days. Just keep them covered!
Are there any alternatives to chocolate pudding?
Yes! You can use vanilla pudding or even a pumpkin spice pudding mix for a twist on this classic dessert.
Final Thoughts
Pumpkin Patch Dirt Cups are not only simple to make but also incredibly versatile. Their delightful appearance and playful flavors make them perfect for any gathering or party. Feel free to customize them with your favorite toppings or ingredients to make them uniquely yours! Give this recipe a try—you won’t be disappointed!
Pumpkin Patch Dirt Cups

Indulge in the playful charm of Pumpkin Patch Dirt Cups, a delightful no-bake dessert that’s perfect for Halloween gatherings or any festive occasion. With layers of creamy chocolate pudding and crunchy cookie crumbs, these whimsical treats are sure to be a hit with kids and adults alike. The simple preparation makes it an excellent family activity, inviting everyone to join in on the fun of layering and decorating. Finished with sweet gummy pumpkin candies and a dollop of whipped topping, these cups not only taste amazing but also bring a cheerful touch to your dessert table.
- Prep Time: 20 minutes
- Cook Time: None
- Total Time: 0 hours
- Yield: Approximately 4 servings 1x
- Category: Dessert
- Method: No Bake
- Cuisine: American
Ingredients
- 1 box (3.9 oz) instant chocolate pudding mix
- 2 cups cold milk
- 1 container (8 oz) whipped topping, thawed
- 1 package chocolate sandwich cookies (15–18 cookies)
- Gummy pumpkin candies (or candy corn pumpkins)
- Fresh mint sprigs (optional)
Instructions
- In a mixing bowl, whisk together the instant chocolate pudding mix and cold milk until smooth. Let it sit for 5 minutes to thicken.
- Crush the chocolate sandwich cookies in a resealable bag until fine crumbs form.
- Layer the cups: Start with chocolate pudding at the bottom, followed by crushed cookie crumbs, and repeat until filled.
- Top each cup with whipped topping and decorate with gummy pumpkin candies and mint sprigs if desired.
- Chill for at least one hour before serving.
Nutrition
- Serving Size: 1 serving
- Calories: 320
- Sugar: 25g
- Sodium: 150mg
- Fat: 15g
- Saturated Fat: 7g
- Unsaturated Fat: 6g
- Trans Fat: 0g
- Carbohydrates: 42g
- Fiber: 2g
- Protein: 4g
- Cholesterol: 5mg